

I have previously written several blog posts about Joomla and SEO.
The first one was Six steps to get your Joomla site indexed in Google. In the post, I talk about things you can do to make your Joomla site attractive in the most important search engine of them all.
A later post was the fourth in my series on Joomla meta tags which discussed how to check your Joomla meta tags in Google Webmaster Tools.
Both of the posts mention Google Webmaster Tools and how to use various functions of these useful tools.
I recently figured out, though, that many people have trouble understanding how to verify their Joomla website in Google Webmaster Tools.
By verifying your site with Google. you tell them that you are the owner of the website and that they may show details about the site to you. Without verifying your site you won't get access to a lot of the more advanced functions of Google Webmaster Tools.
Read on to get the full instructions on how to verify your Joomla site in Google Webmaster Tools.
3 ways to verify your Joomla site in Google Webmaster Tools
To make it easy to verify your site, Google provides three methods for you to choose from:
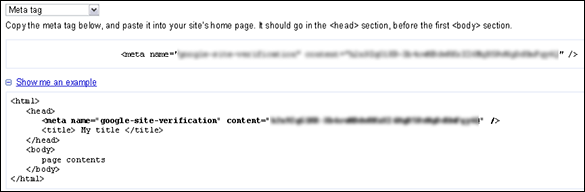
1. Meta tag
Google provides a meta tag that you can incude in your Joomla template to verify the site. You must copy the meta tag, and paste it into your site's home page. It should go in the <head> section, before the first <body> section.
To use this meta tag, you need to copy the tag from the Google Webmaster Tools page and paste it into your template index.php file.
The template index file is located in the folder /templates/TEMPLATENAME/ folder on your server.
How to add the meta tag to your Joomla site
- Do a backup of the index.php file.
- Open the file in your HTML editor of choice. I prefer using eXtplorer, which is file manager for Joomla. But you can also download the file via FTP and edit it with a text editor, Dreamweaver or other software.
- After opening the file, locate the HEAD section. That means the section which is enclosed by the <head> and </head> tags.
- Paste the meta tag into this section.
- Save (and upload) the file to your site.
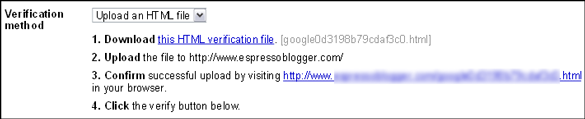
2. Upload an HTML file
This is the easiest method in my opinion. All you have to do is upload the file Google Webmaster Tools provides in the website root folder.
This means the same folder as the configuration.php file is located.
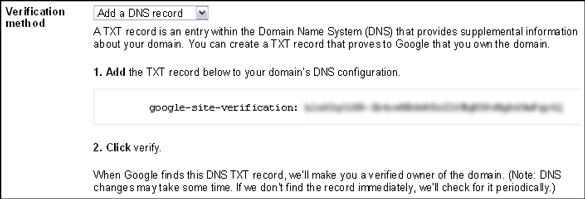
3. Add a DNS record
The most advanced method of verification is to add a DNS record. This requires you to have control over and a knowledge of the DNS for the domain in question.
A TXT record is an entry within the Domain Name System (DNS) that provides supplemental information about your domain. You can create a TXT record that proves to Google that you own the domain.
Whatever method you choose, you now need to click the Verify button (or Verify later) in Google Webmaster Tools. Google will then report back and tell you if the verification has been correctly implemented or not.
![]()
Good luck - and make sure you take advantage of all the goodies in Google Webmaster Tools!